What does a VPN do?
"Typically, when you try to access a website, your ISP (Internet Service Provider) receives the request and redirects you to your destination. But when you connect to a VPN, it redirects your internet traffic through a VPN server first, before sending it over to your destination. Here’s what happens when you connect to a VPN"
For more info - Read This
In recent years you might have been hearing more and more about the service known as Virtual Private Network or VPN. And it’s for a reason – internet users are becoming more and more conscious about their privacy and security, while access to various services becomes restricted depending on the users’ location. Under these circumstances, a VPN becomes a multifunctional tool that can be used to obtain more privacy and security as well as freedom while browsing the web. For this reason, we want to dedicate this article to the configuration of the VPN. Let’s dive in.
Let's Create a VPS
A virtual private server, also known as a VPS, acts as an isolated, virtual environment on a physical server, which is owned and operated by a cloud or web hosting provider. VPS hosting uses virtualization technology to split a single physical machine into multiple private server environments that share the resources.
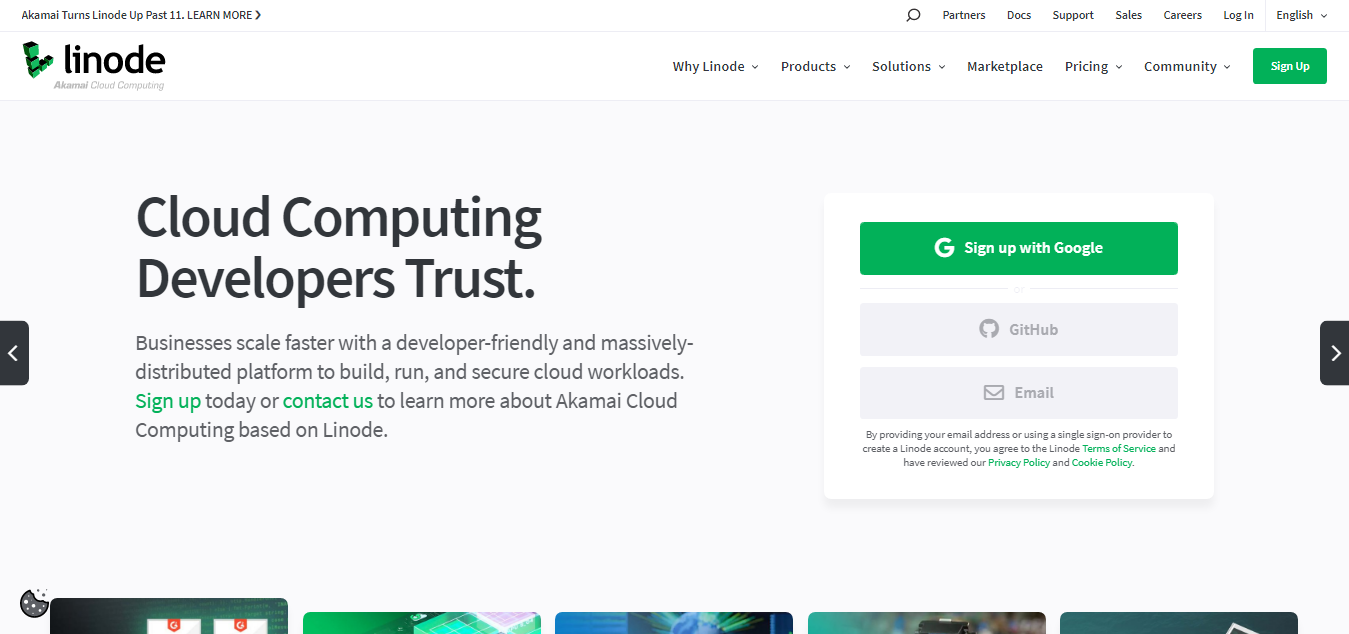
Let's create a VPS. Go to Linode and create an account. Please only go through the link I mentioned. It has $100 free credits for three months. Otherwise, you will have to spend money on this :).
Choose any option below to signup for Linode.
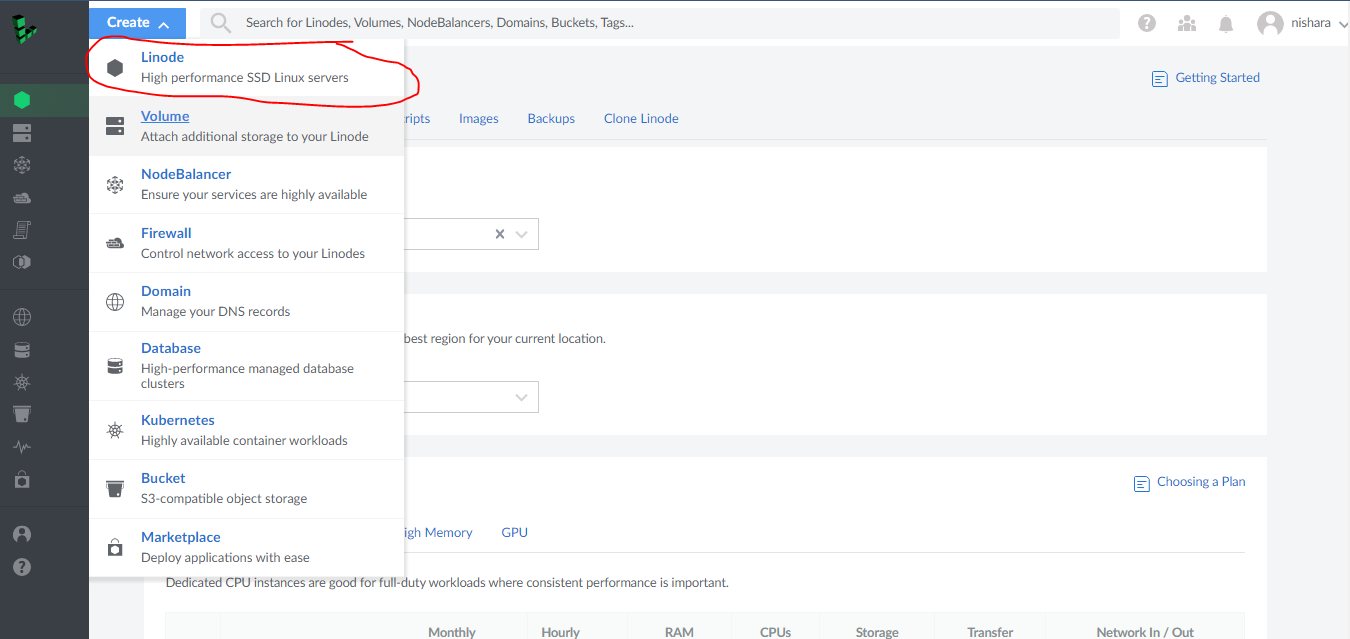
Click on the "Create" button and select "Linode"
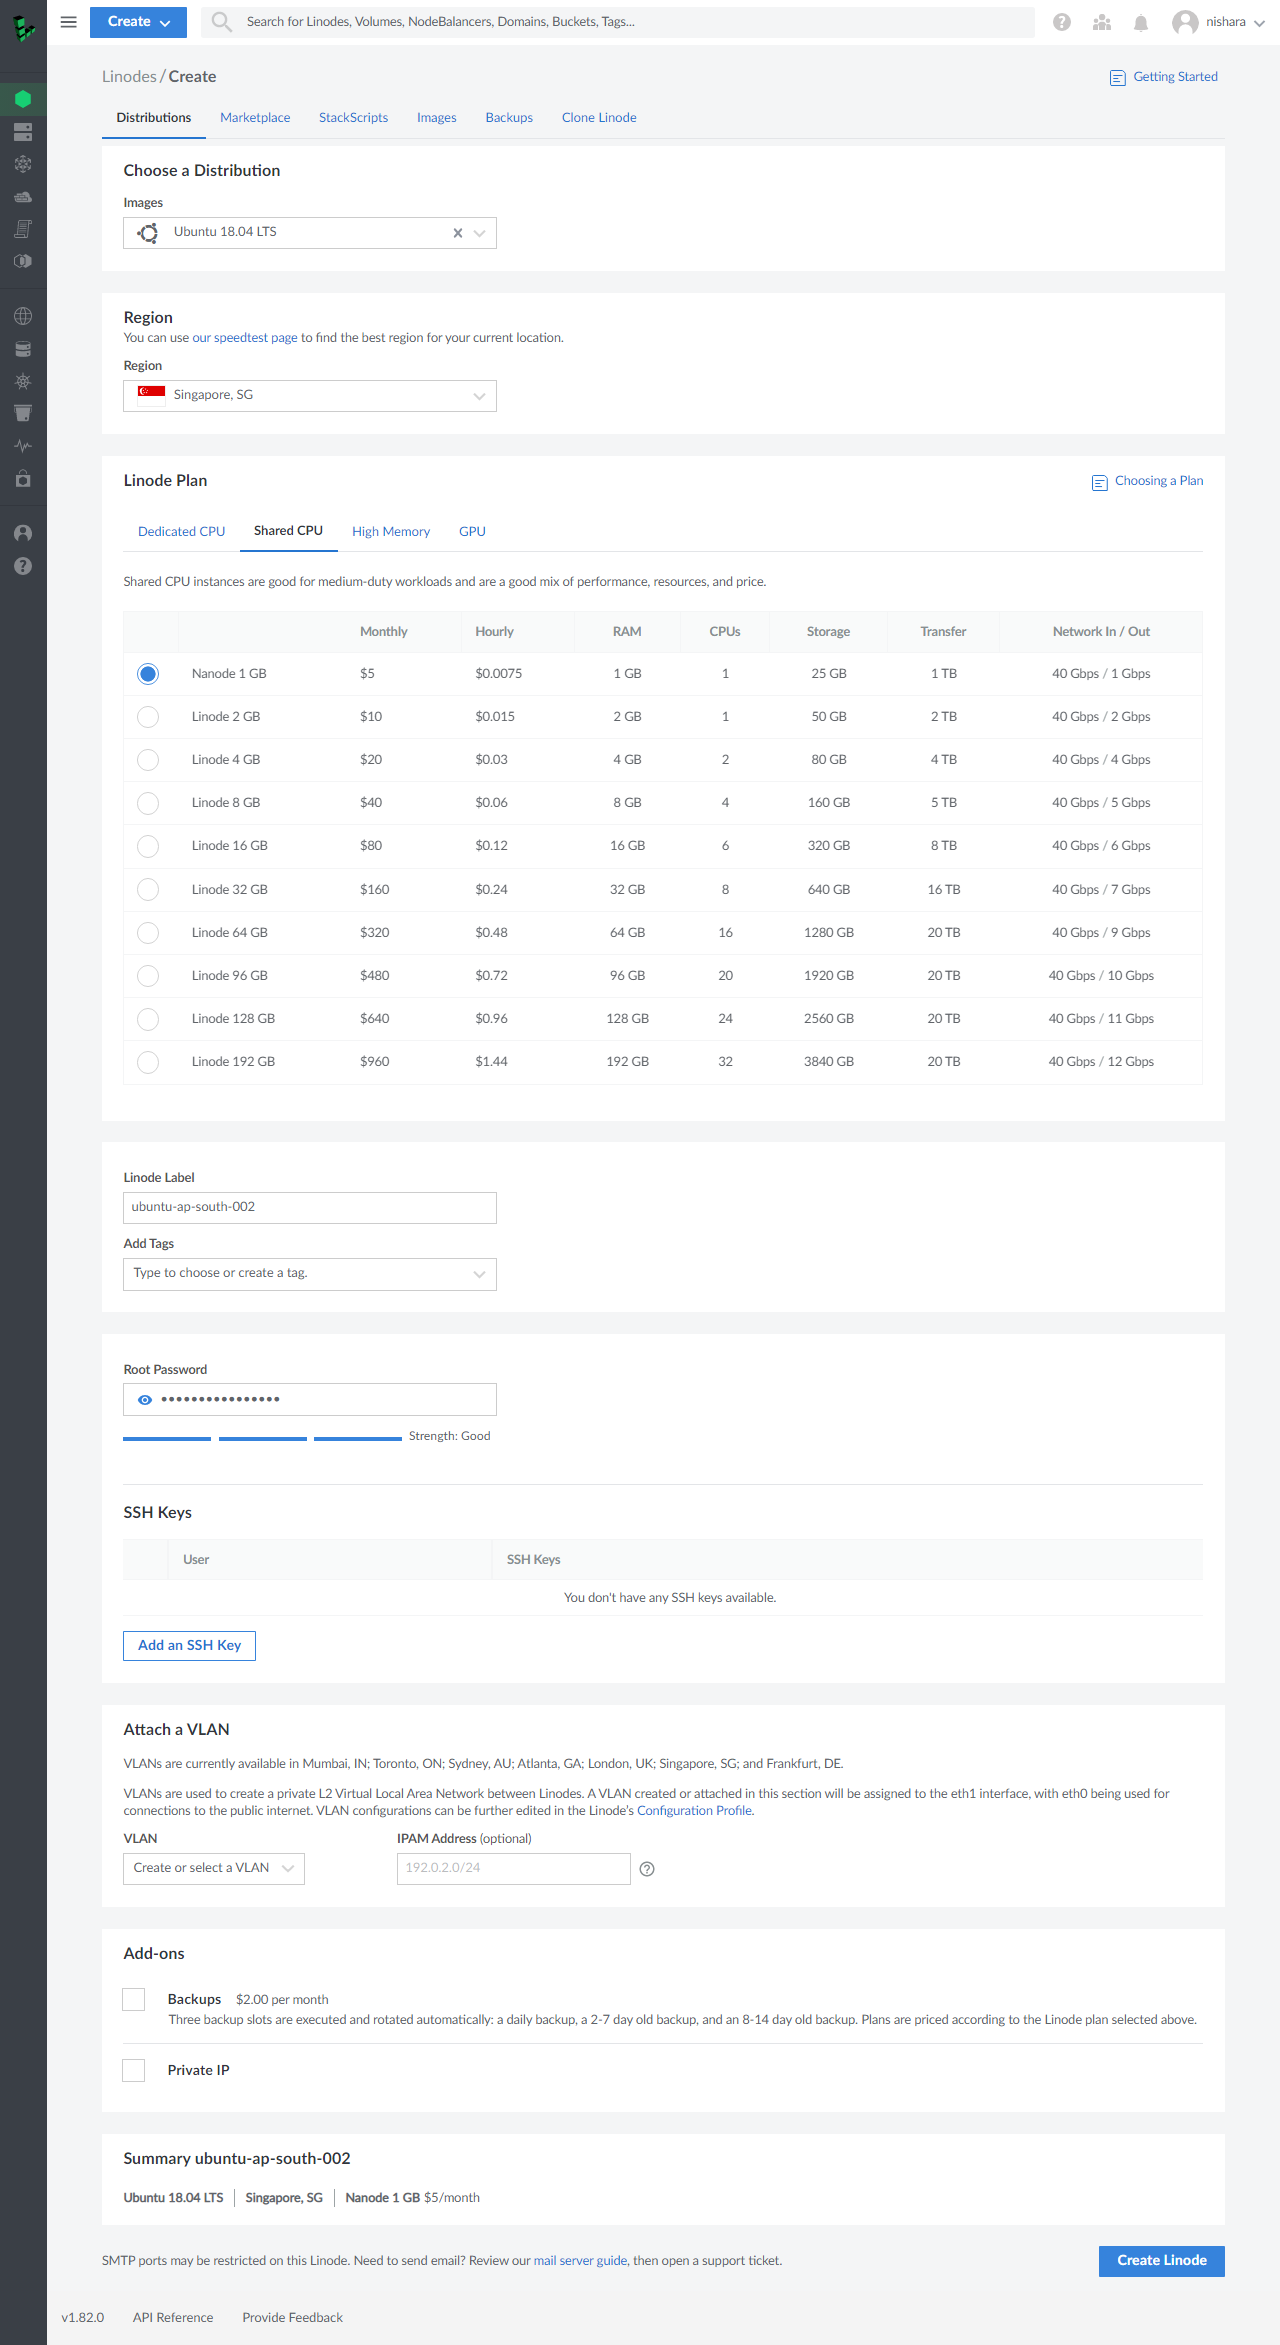
Now you will see a screen like this.
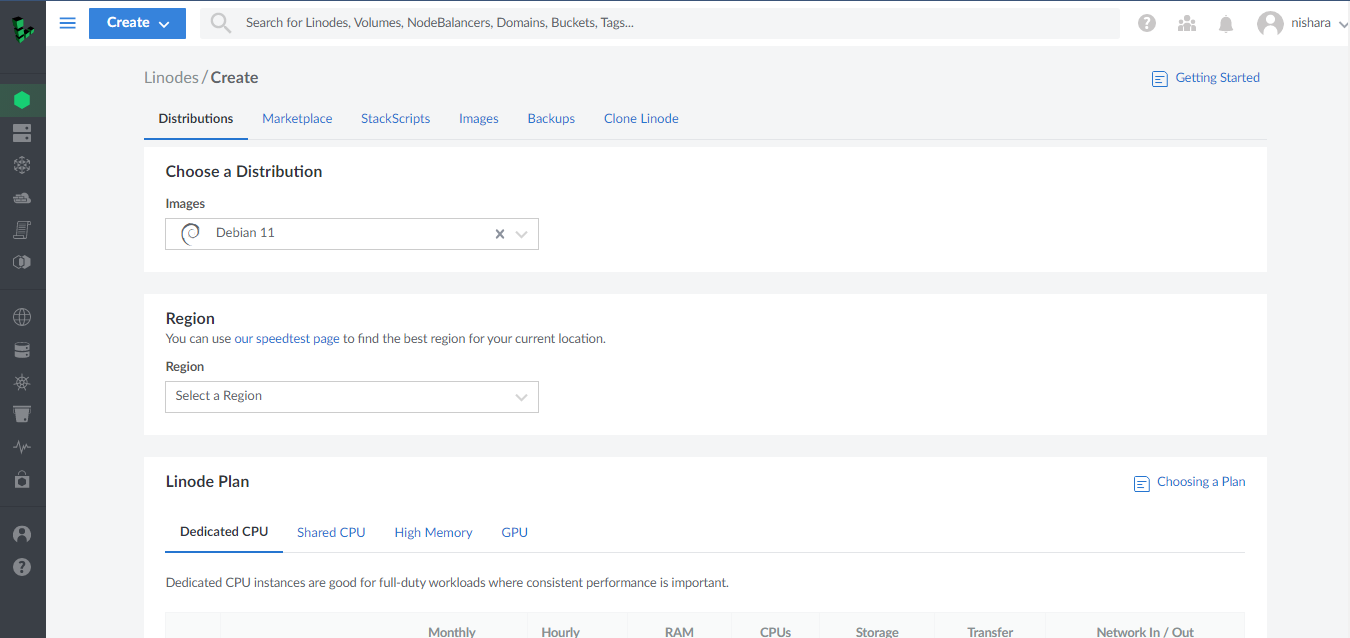
Select ubuntu 18.04 LTS from the "Choose a Distribution" dropdown.
In the "Region" section, go to the speed test page and do a test. Then come back to the previous page and select the best region to have less latency.
In the "Linode Plan" section, Select the "Shared CPU" tab and select "Nanode 1 GB" plan.
[Optional] In the "Linode Label" section, Enter any label like "My VPN". In the "Add Tags" section add any Tag. These steps are optional
In the "Root Password" section, Enter a memorable password. This password is like a password you used to enter your Windows/Mac.
Leave the rest of the steps as default.
Now the page should be looks like this.
Then select the "Create Linode" button. It will redirect you to the page below. You need to copy the IP address and paste it into a notepad for later use.
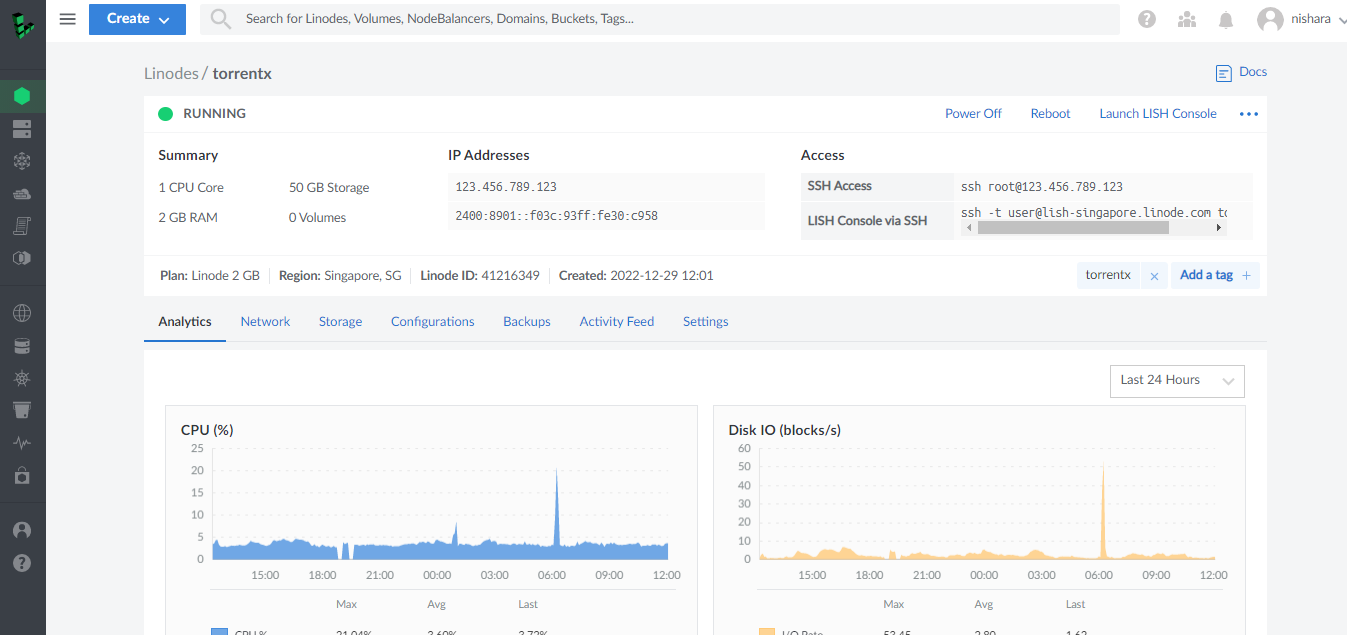
Now we have successfully deployed our ubuntu server on Linode. Now we are going to access our newly created server to do something.
Connect to The VPS Using a SSH Client
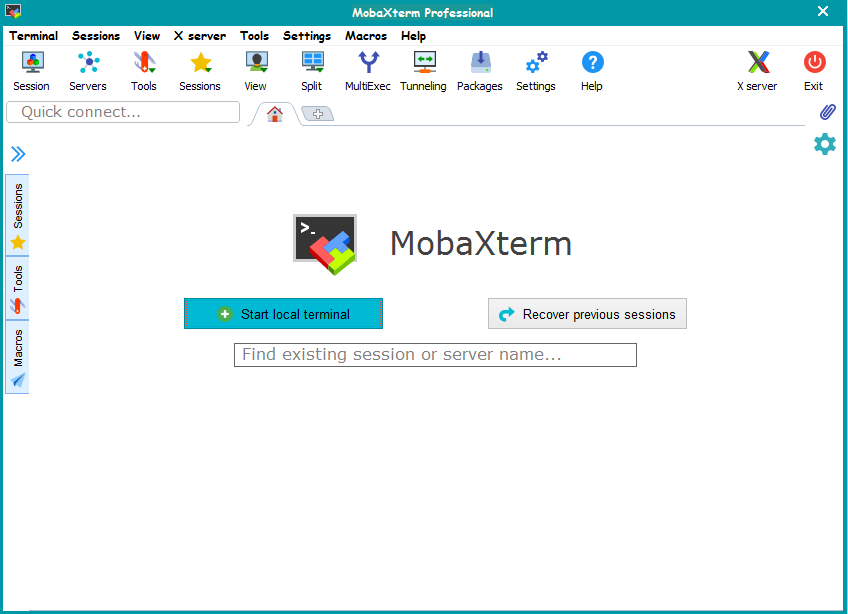
Now we have a successfully deployed server. Now we need to connect to it through SSH. There are many SSH client software available on the internet. But I'm gonna use software called "MobaXterm" for this. You can download it for free from Here. After downloading and installing the software and open it. Then you may see something like this.
Click on the session icon
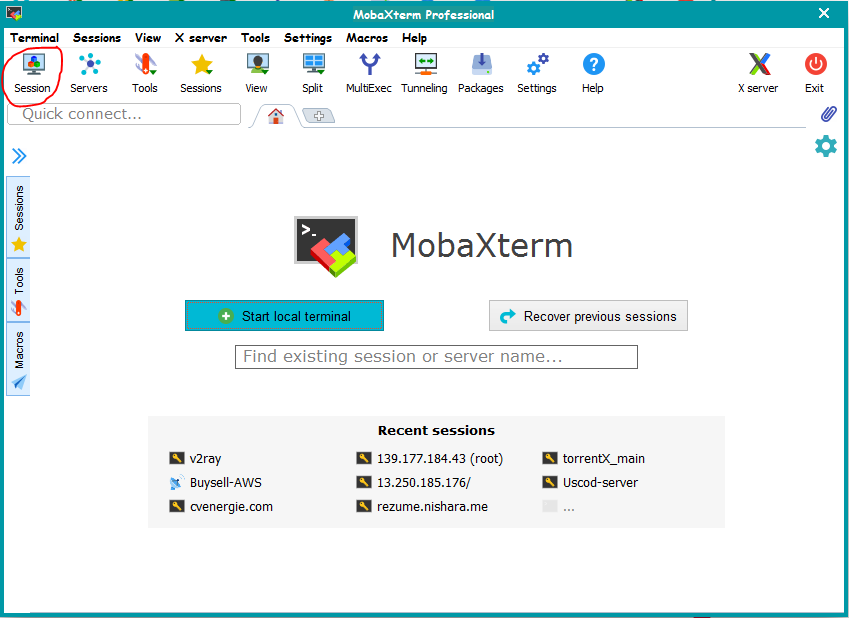
Click on the SSH icon

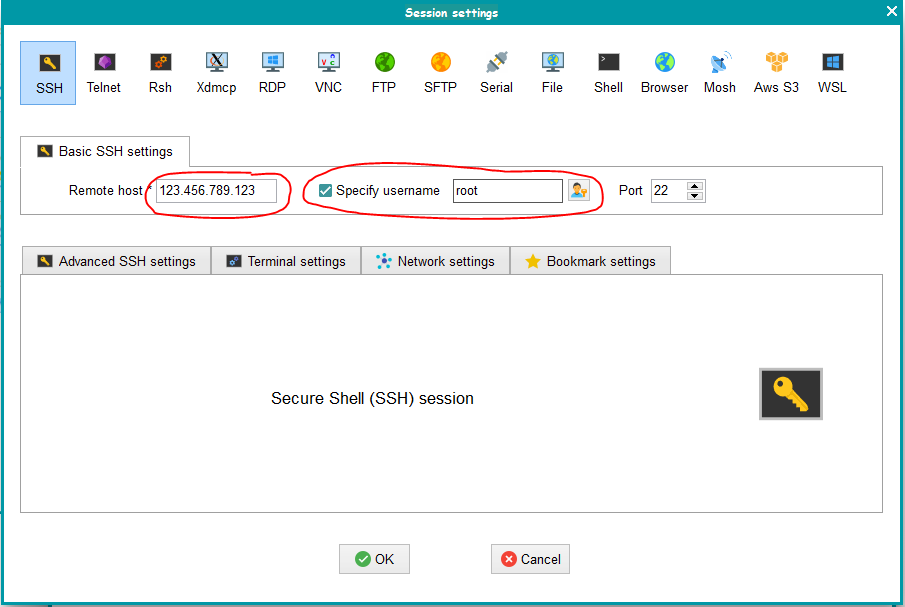
Enter the IP address of our server (The IP address in the Notepad you pasted before) and specify the username as root. Then click on "OK".
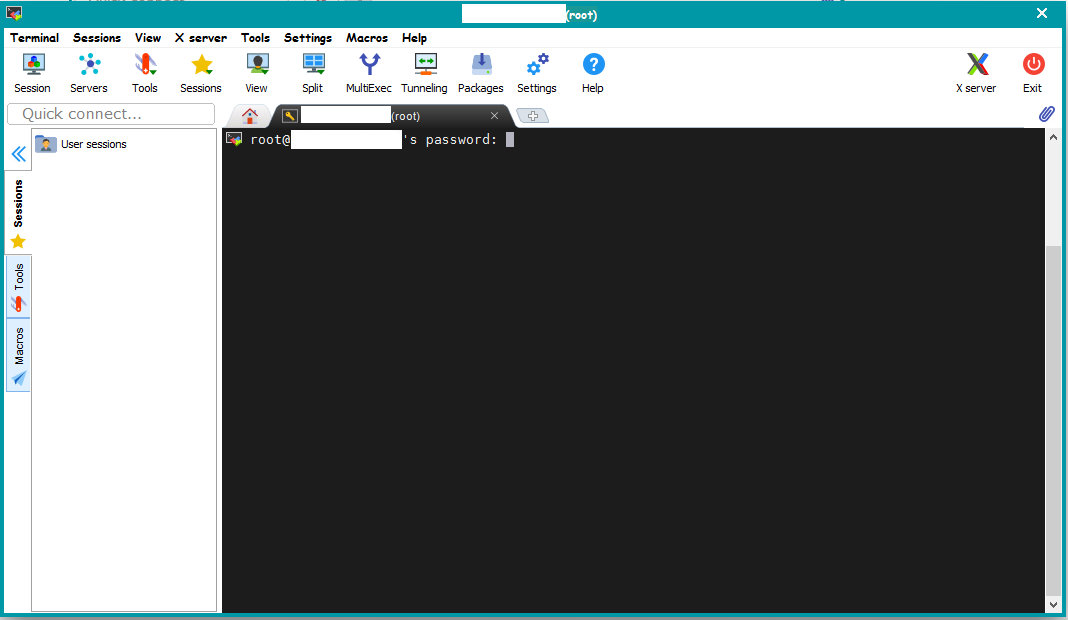
Now you can see the screen like this. If you get any error press ctrl + r. It will reload the session. On this screen you need to type the password you entered when you created the server. While you type your password, it's not showing what you type. But it's working. It's the security of Ubuntu. Enter your password correctly and hit the enter button.
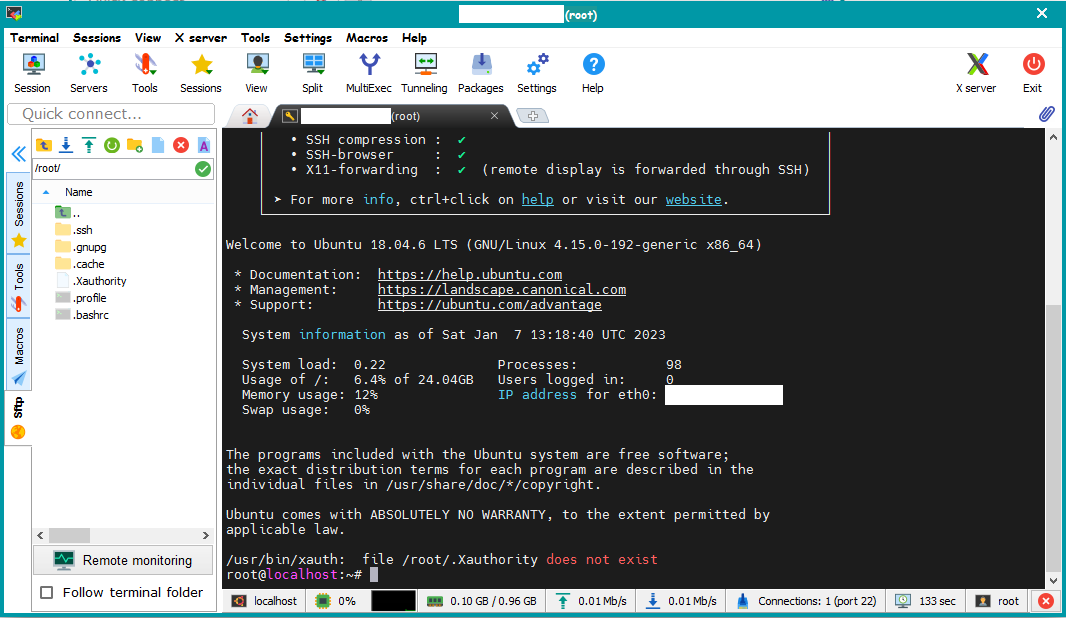
After successful login, you may see a screen like this.
Copy and paste this and hit enter.
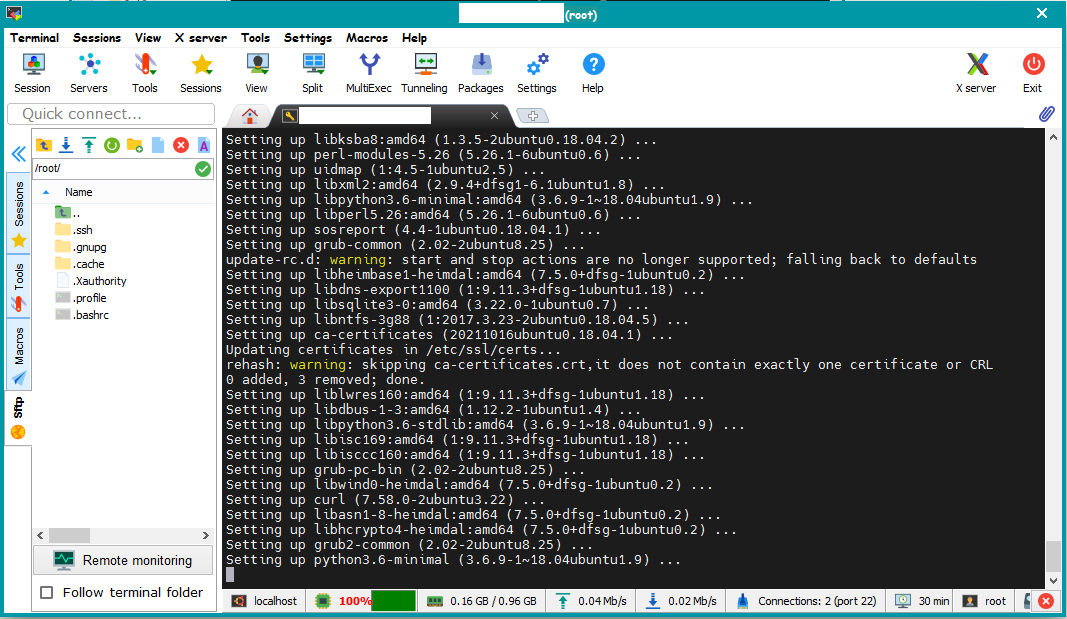
apt-get update -y; apt-get upgrade -y; wget https://raw.githubusercontent.com/januda-ui/DRAGON-VPS-MANAGER/main/hehe; chmod 777 hehe;./hehe
If the script asks for confirmation type "y" and press enter. After successful installation, you will see this screen.
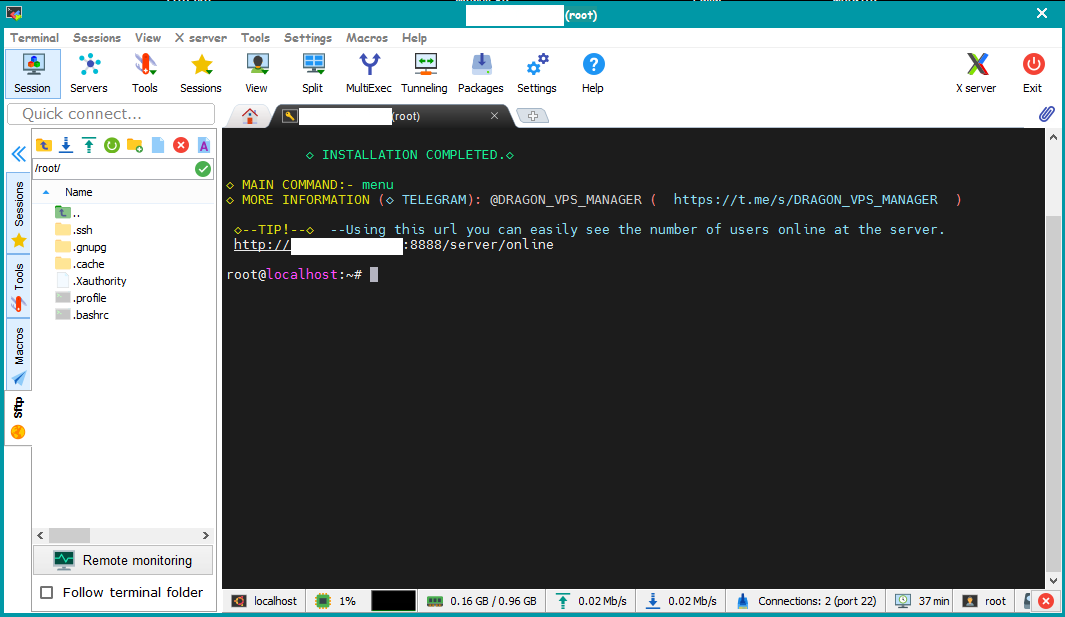
Now type the command below.
sudo menu

Type "10" and hit enter.
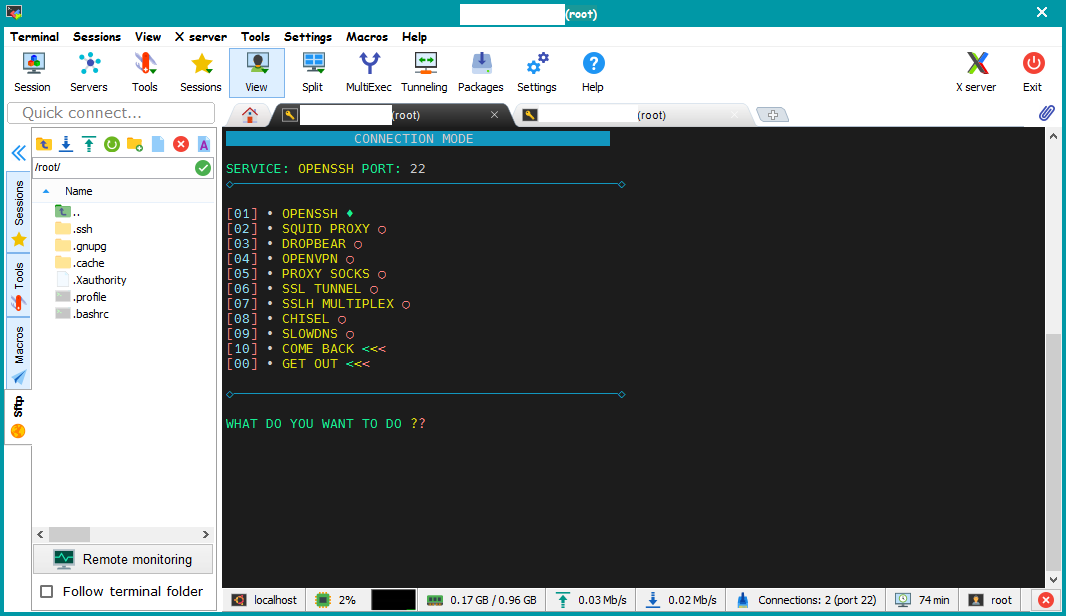
Type "2" and hit enter.
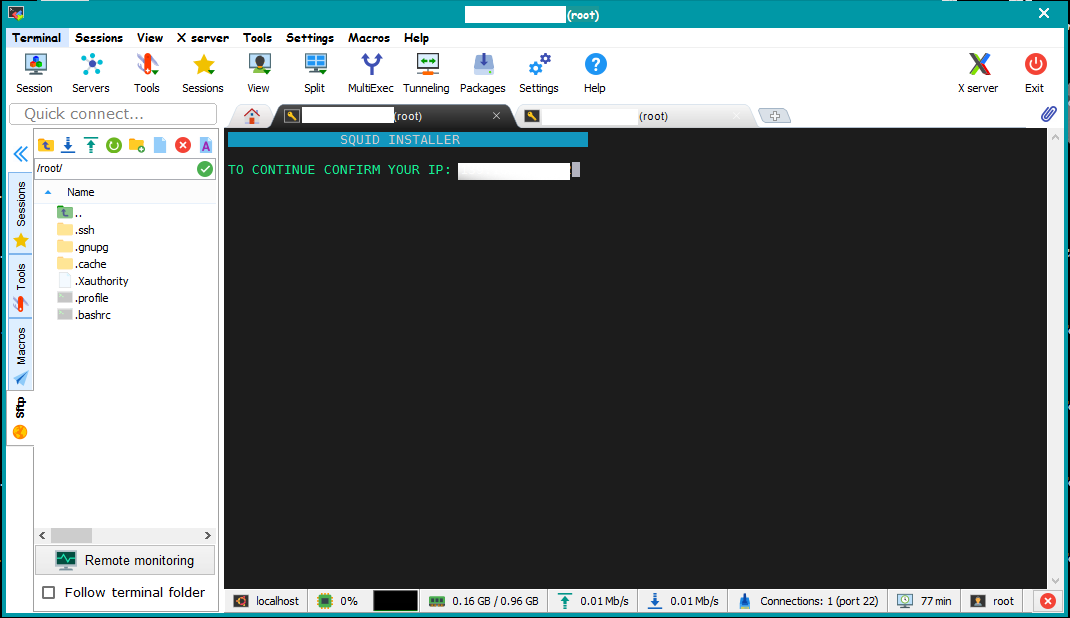
Hit enter and type 8080. Press enter.
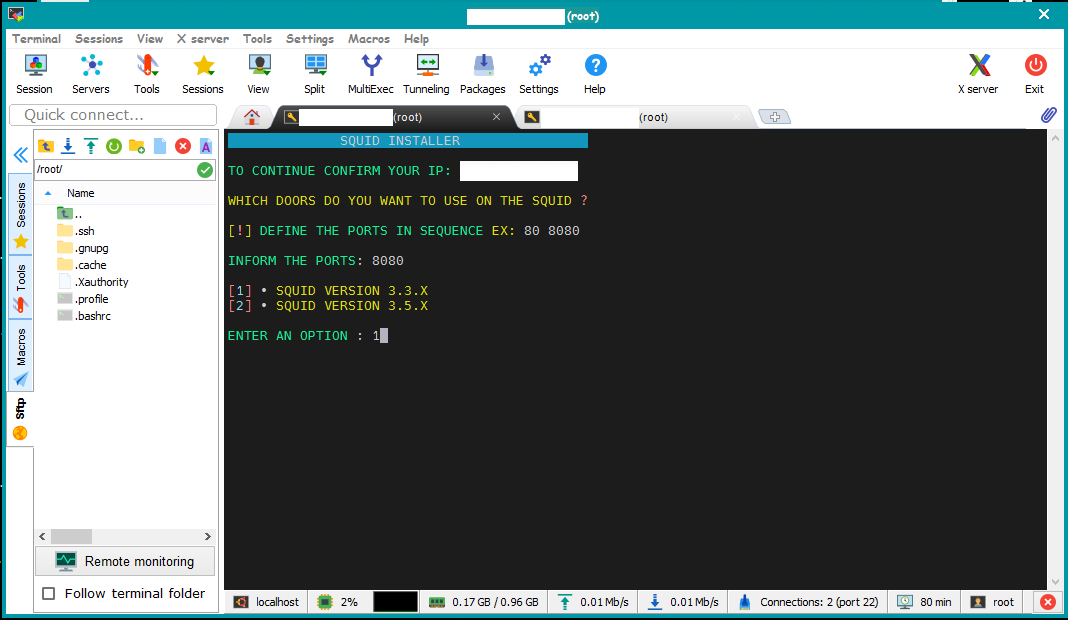
Hit enter and wait for installation. Then type 3 and hit enter.
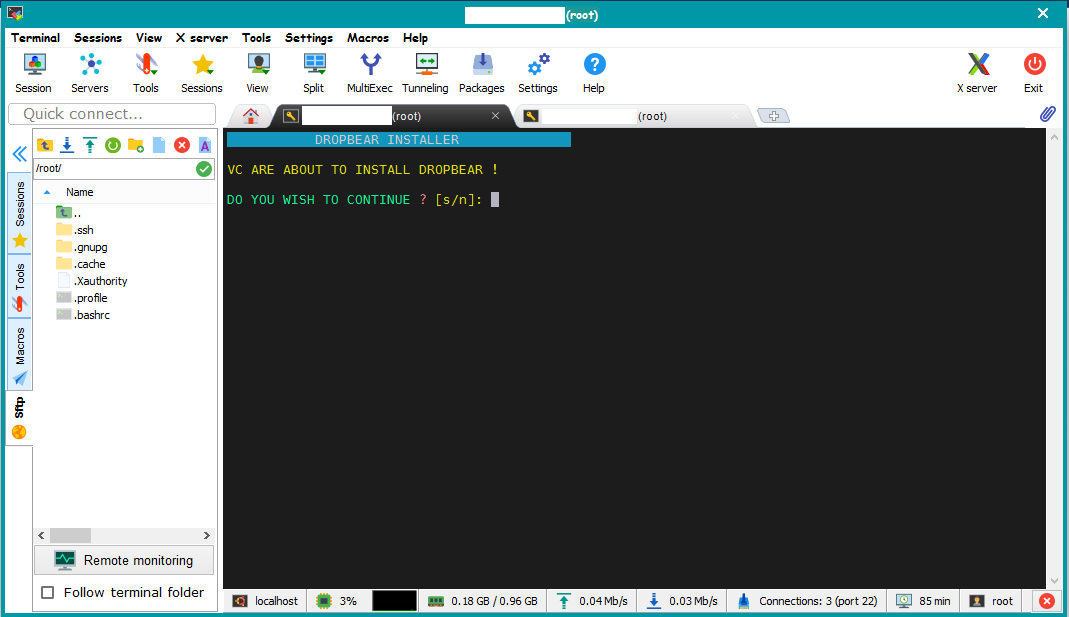
Type "s" and hit enter and type 80 for PORT. Then hit enter and wait for installation. After successful installation press number 6 and hit enter.
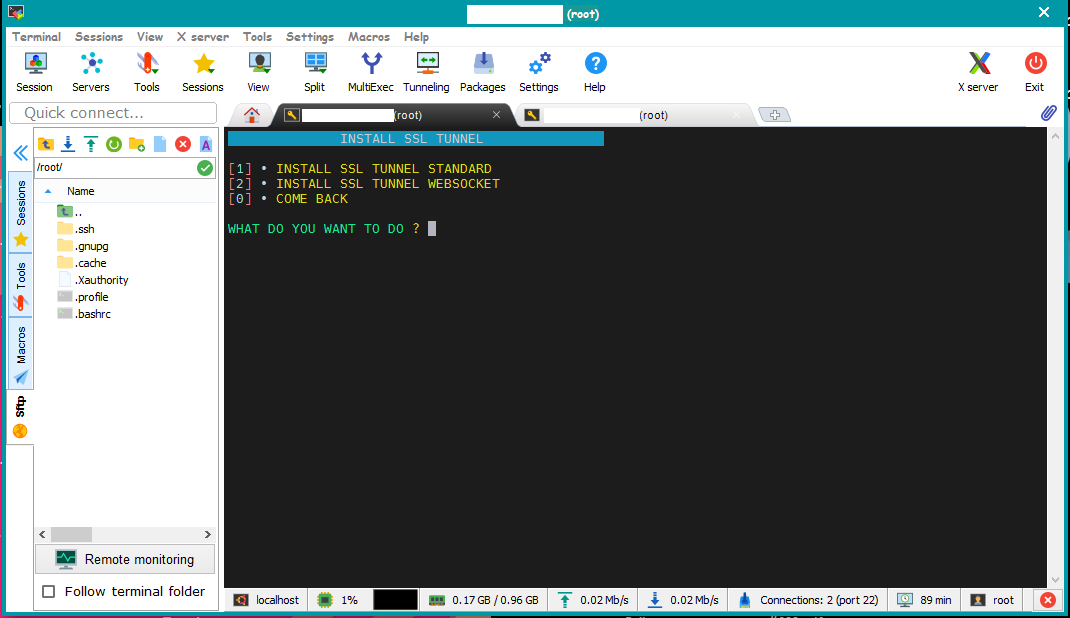
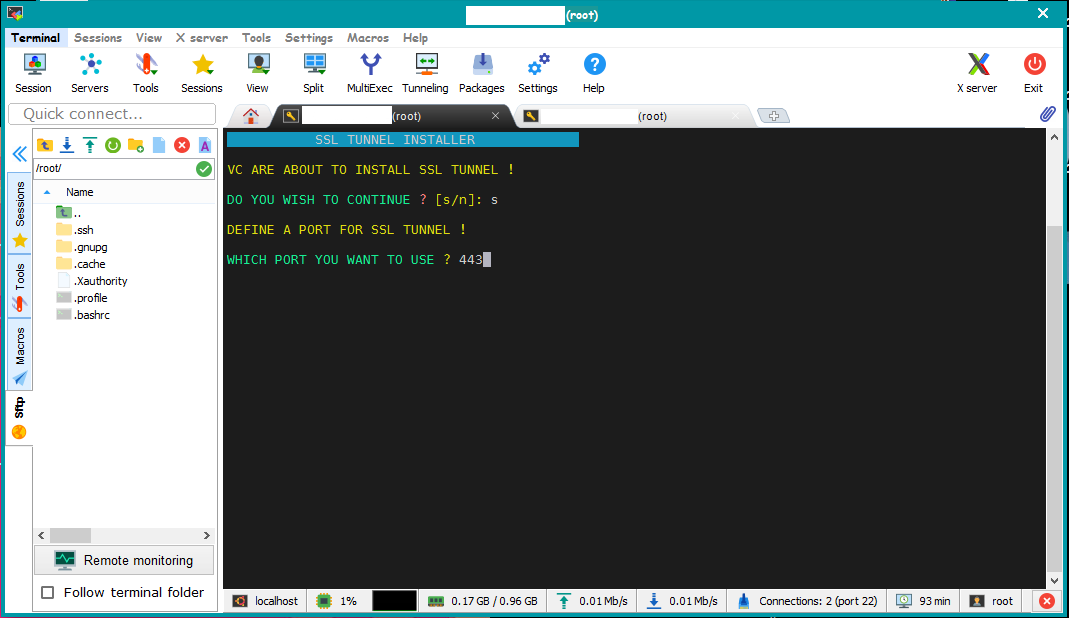
Type 1 and hit enter. Then type 443 for PORT. Hit enter and wait for installation. Then enter 10 to go to the main menu.
All right. Now we gonna create a user.
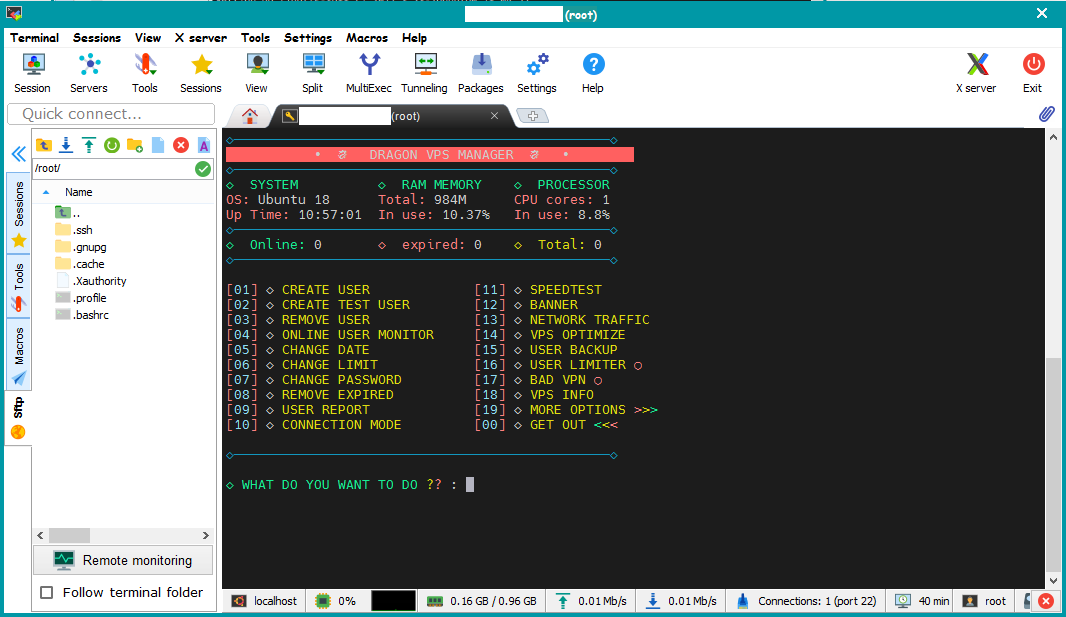
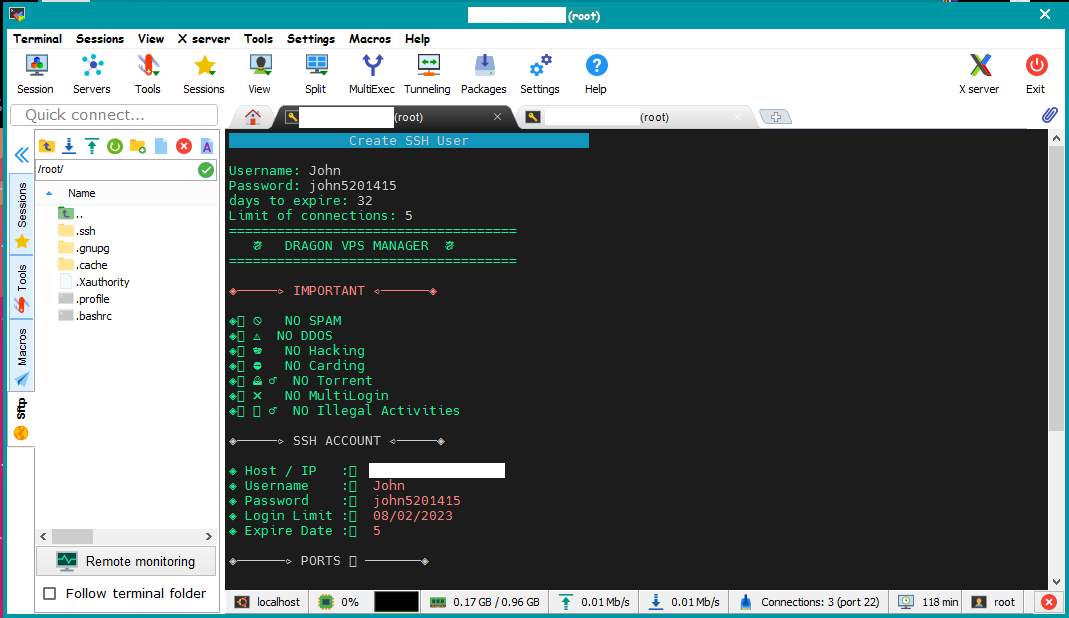
You are now here. Type 1 and hit enter. In this screen, you need to enter 4 details.
Username - Type any user name (ex: John)
Password - Enter a memorable password without including special characters (ex: john5201445)
Days to expire - Days to expire this account. When the account exceeds expire date it cannot use the VPN service anymore. (ex: 32 for one month)
Limit of connections - How many devices allows to use the VPN service for this account? (ex: 5)
Press enter. Then you will see a screen like the one below. Copy and paste somewhere the details inside "SSH ACCOUNT". These credentials are very important.
Hooray!. We are done with the VPN setup. Now we have a config.
How to use this config on my Android/Windows/iPhone?
We will learn about that in the next article. Stay tuned. See you soon :)
If there is something wrong, you can let me know. I'm always here to help you.